
Individual accounts: creating Apple keys
The two keys you create on an individual Apple account so we can sign your app and send notifications.
This step is only for individual (sole proprietor) Apple accounts. On individual accounts, Apple only lets the account holder into the section where apps are signed; people you add to the team cannot enter it. So you create two keys once and send them to us.
The keys only work on your account and you can revoke them at any time. We never ask for your password.
First key: publishing
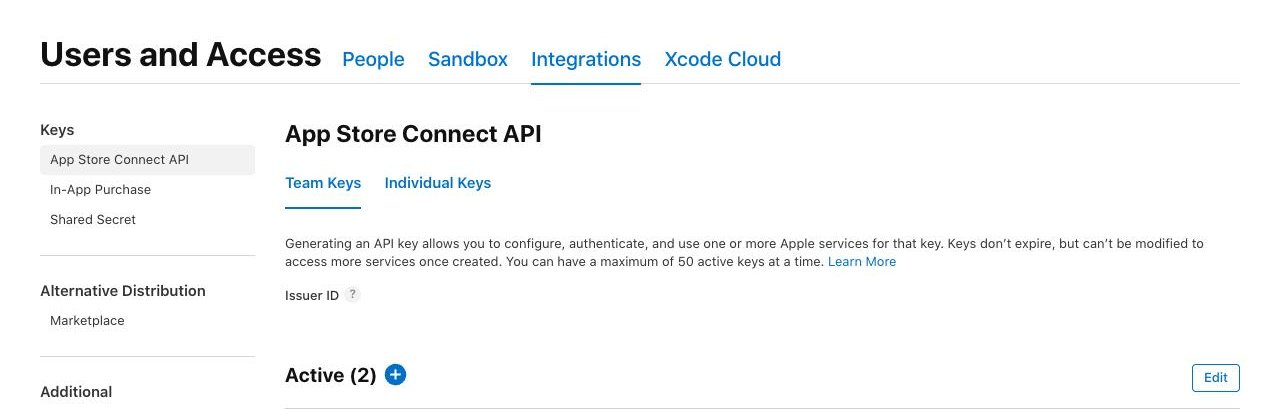
Open the Integrations tab
In App Store Connect, go to Users and Access, the Integrations tab, Team Keys. If you see "Request Access", approve it. Then click the blue + next to Active.
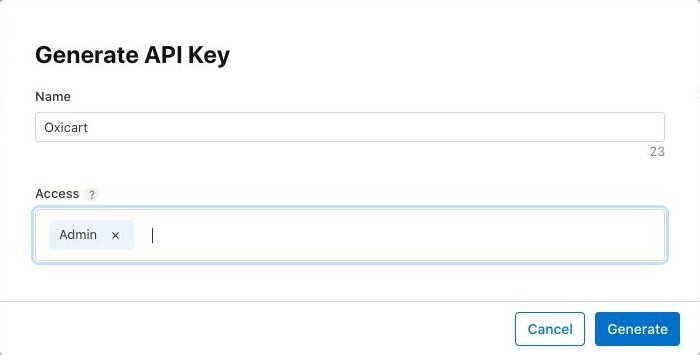
Generate the key
Download and note
- Click Download on the new row to get the .p8 file.
- Note the Key ID on that row and the Issuer ID at the top of the page.
Second key: notifications
Open the Keys page
On developer.apple.com, Certificates, Identifiers & Profiles, Keys, click +.
Select the notification service
Enter a name (e.g. Oxicart Push), check Apple Push Notifications service (APNs), then Continue and Register.
Download and note
Click Download to get the .p8 file and note the Key ID on the page. This file can also be downloaded only once.
Send them to us
In a single email: both .p8 files, both Key IDs and the Issuer ID.
Address: hello@o2dijital.com
Organization accounts usually do not need this step. If they do, we will write to you.